Ready to take your turkey game to the next level? Look no further than smoking it on a Traeger! Because if you’re a fan of juicy, flavorful, and perfectly cooked turkey, then you’re in for this treat.
These are some basic steps to smoke a turkey on a Traeger:
- Prepare the turkey
- Soak the wood pellets
- Set up the Traeger
- Monitor and baste the turkey
- Wrap, rest, carve, and serve

In the rest of the blog, I’ll walk you through the step-by-step process of smoking a turkey on a Traeger. Whether you’re a seasoned pro or a complete novice, you’ll pick up some great tips and tricks along the way. So, let’s get started!
What You’re Going To Need
Before I dive into the step-by-step process of smoking a turkey on a Traeger, let’s talk about the basics.
Here’s what you’ll need:
- Turkey (size doesn’t matter, as long as it fits in your Traeger)
- Traeger
- Traeger wood pellets (I recommend apple, pecan, or cherry)
- Meat thermometer
- Butter or oil (for basting)
- Salt, pepper, and other seasonings of your choice
- Aluminum foil
First Things First: Let’s Talk About the Traeger.
If you’re new to the world of BBQ, you may be wondering what a Traeger is. Simply put, a Traeger is a type of wood-fired pellet grill that uses wood pellets to smoke and grill food.
Unlike traditional charcoal or gas grills, the Traeger has a digital control system that allows you to easily set the temperature and cooking time. All you need to do is just set the temperature and time and walk away while the Traeger does all the work. Magic, right?
But why smoke a turkey on a Traeger? There are many reasons why you should consider smoking a turkey on a Traeger. For starters, the wood-fired smoke from the pellets imparts a rich, smoky flavor that is unmatched by any other cooking method.
Now, let’s get smokin’!
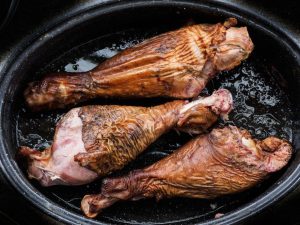
Step 1: Prepare the Turkey
First things first, let’s get that turkey ready for its smoky transformation. This means thawing the turkey (if it’s frozen), removing the giblets and neck, and patting it dry with paper towels. Once the turkey is thawed and dry, it’s time to season it.
I like to use a simple combination of salt, pepper, and garlic powder, but you can use any seasonings that you prefer. Be sure to season the inside of the turkey as well as the outside.
Step 2: Soak the Wood Pellets
While the turkey is resting, it’s time to soak the wood pellets. Soaking the pellets helps to release more smoke and flavor into your turkey.
PS: This is the secret ingredient to a mouth-watering turkey.
Oops. Did I just share it with everyone? Anyway…
Simply place the pellets in a bowl of water and let them soak. Thirty minutes should do the trick. Once the pellets are soaked, drain the water and set them aside, you’re getting closer to the good stuff!
Step 3: Set Up the Traeger
This is the fun part. It’s time to fire up that Traeger!
Make sure that the hopper is filled with the soaked wood pellets, set it up according to the instructions, and make sure the temperature is set to 325°F. Allow the Traeger to preheat for about 10 minutes before adding the turkey.
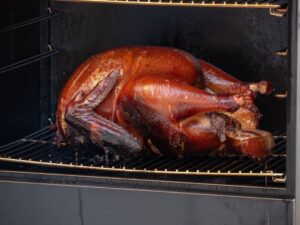
Once the Traeger is preheated, it’s time to add the turkey to the grill. Place the turkey on the grill grates and close the lid. Now let the magic happen!
Next, let’s get ready to give this turkey the smoky treatment it deserves! Get your tongs and baste brush ready; it’s time to shine.
Step 4: Monitor and Baste the Turkey
One of the keys to smoking a turkey on a Traeger is monitoring the temperature. You’ll want to check the turkey’s internal temperature every hour or so using a meat thermometer. The turkey is done when the internal temperature reaches 165°F.
Keep a close eye on that turkey; you don’t want to overcook it or undercook it. It’s all about finding that perfect balance.
Now, grab a glass of wine, and get ready to do some basting. To keep the turkey moist and juicy, it’s important to baste it every hour or so. Simply brush the turkey with melted butter or oil, and season it with your preferred spices.
Step 5: Wrap, Rest, Carve and Serve
Finally, the moment we’ve all been waiting for. Once the turkey has reached an internal temperature of 160°F, it’s time to wrap it in aluminum foil. Wrap the turkey tightly in the foil, and continue cooking until the internal temperature reaches 165°F.
Next, it’s time to rest and serve the turkey. Once the turkey has reached the desired temperature, remove it from the Traeger and let it rest for at least 10 minutes before carving. This will give all those flavors a chance to settle and make sure the juices don’t escape.
Serve up that juicy, smoky masterpiece, and watch as everyone goes back for seconds. And there you have it – a perfectly smoked turkey on a Traeger!
Whether you’re serving it for Thanksgiving dinner or just a weeknight meal, this turkey is sure to be a hit. Get ready for some turkey-licious goodness!
Final Thoughts
Voila, there you have it! A perfectly smoked turkey on a Traeger that’s gonna leave your guests gobbling for more.
Smoking a turkey on a Traeger is a great way to add a rich, smoky flavor to your turkey. With the help of this guide, you’ll be able to smoke a juicy, perfectly cooked turkey every time. So, let’s raise a glass to the perfect turkey dinner brought to you by the magic of the Traeger!
But wait, before you dig in, make sure to snap a photo and post it on social media to show off your turkey mastery.